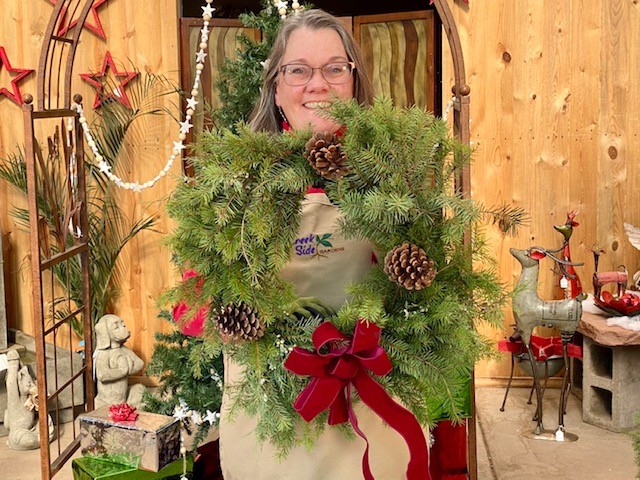
View Our Holiday Wreath Making Video Here:
Materials:
1 – 14” Diameter 2-Ring Metal Wreath Form
1 – 24-gauge Floral Paddle Wire (16’ length)
Assorted Evergreen Branches
3 – Pre-Wired Pinecones
1 – Decorative Bow
Instruction Sheet (video link available on www.plantsbycreekside.com)
Tools:
Pair of By-Pass Pruners or Sturdy Kitchen Shears
Ruler or Measuring Tape
Pair of Garden Gloves
Container(s) for water to keep greens hydrated until ready to use
*Apron
*Table Cover
*Drop cloth for Floor
*Evergreen branches may be sticky with resin and will be wet from soaking in water!
Assembly Directions:
 Step 1 –
Cut 10 – 6” Lengths of 24-gauge Floral Paddle Wire. These pieces are for wiring individual evergreen bundles, set aside.
 Step 2 –
Remove a couple of evergreen branches from the water container and place on worktable. Using a ruler, measure and cut approximately 8” lengths from branches and set aside. These are “the Clippings.” Continue with remainder of branches. Included in the Assorted Evergreen Branches there are Specialty Greens for accent, cut those into 8” lengths and set aside.
 Step 3 –
Select 5 assorted Clippings for the first Bundle. Hold these Clippings together. Take one 6” length of wire and wrap it around the lower 1” of the Clippings, set aside. Continue with the remainder of Clippings. 3 of the Bundles assembled will incorporate a piece of Specialty Greens. Each wreath takes approximately 10 Bundles. You may have extra clippings, these can be used to fill in bare spots in the wreath, if needed.
 Step 4 –
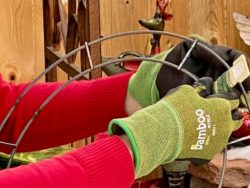
Lay the wreath form on the table, take the paddle wire and unravel a 6” length. Attach wire by weaving a figure 8 pattern around the cross bar at the 12:00 position on the wreath form. Do not cut the wire off the paddle.
***Note: The wreath form has 7 “crossbars.” These resemble the hour markings of a clock. Starting at the top – 12:00, 2:00, 4:00, 5:00, 7:00, 8:00, and 10:00 ***
 Step 5 –
Pick up the Metal Wreath Form in your left hand (if you are right-handed) between 10:00 and 12:00, working clockwise (for left-handed between 12:00 – 2:00 working counter-clockwise). For stability and maneuverability, hold it secure to your waist area.
Take the first Bundle, place it at the 12:00 position on the Metal Wreath Form holding the Bundle under your left hand with the stem ends pointing to the right, take the Paddle Wire with your right hand and tightly wrap around both rings on the bottom 1-1/2” of the Bundle 3 times. Do not cut the wire off the Paddle.
Take the next Bundle, place it over the First Bundle overlapping the wrapped wire stems. Repeat wiring as with First Bundle. Continue with 1 more Bundle.
 Step 6 –
At this point there are 3 attached Bundles. Adjust for placement, securing, and symmetry. This is where you will add the Fourth Bundle containing the Specialty Greens. Continue this pattern; 3 regular Bundles, 1 Bundle with Specialty Greens to complete your Wreath.
 Step 7 –
Once all the Bundles have been attached there will be approximately 6” remaining on the Floral Paddle Wire. Take this end wire and thread it through the front of the wreath to the back. Lay the wreath on the table, face down. As in Step 4, tightly wrap the wire around the Metal Wreath Form.
 Step 8 –
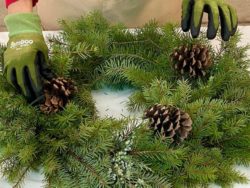
You are now ready to attach the Pre-Wired Pinecones and Decorative Bow. Place the wreath in front of you on the table face up. Before attaching, place a Pinecone at the 2:00, 4:00, and 7:00 positions on the Wreath (see note in Step 4) Take the ends of the wire and thread through the Bundles and twist onto the Metal Wreath Form. Repeat for the remaining Pinecones.
Next following the same process for the Pinecones, place the Decorative Bow at the bottom of the Wreath. Thread the ends of the wire through the Bundles and twist onto the Metal Wreath Form.
While the Wreath is face down, trim any protruding wire or rough stems. This Step protects walls/doors from being scratched.

